Adding Database Devices for Monitoring
ObserveOps (formerly known as AIOps) monitors database devices by discovering them through a JDBC credential profile and provisioning them as monitors. Once provisioned, ObserveOps continuously collects performance metrics and generates alerts based on what it finds.
Supported Database Types
| Database | Connection Protocol |
|---|---|
| Oracle RAC Cluster | JDBC |
| Oracle Database | JDBC |
| MariaDB | JDBC |
| MySQL | JDBC |
| SQL Server | JDBC |
| PostgreSQL | JDBC |
| SAP HANA | JDBC |
| MongoDB | JDBC |
| Redis DB | JDBC |
| Elasticsearch | HTTP/HTTPS |
| ClickHouse | HTTP/HTTPS |
| PostgreSQL | JDBC |
Adding a Database Device
1. Create a Credential Profile
Go to Menu. Select Settings  . Select Discovery Settings
  . Select Credential Profile. The Credential Profile screen opens. Select Create Credential Profile.
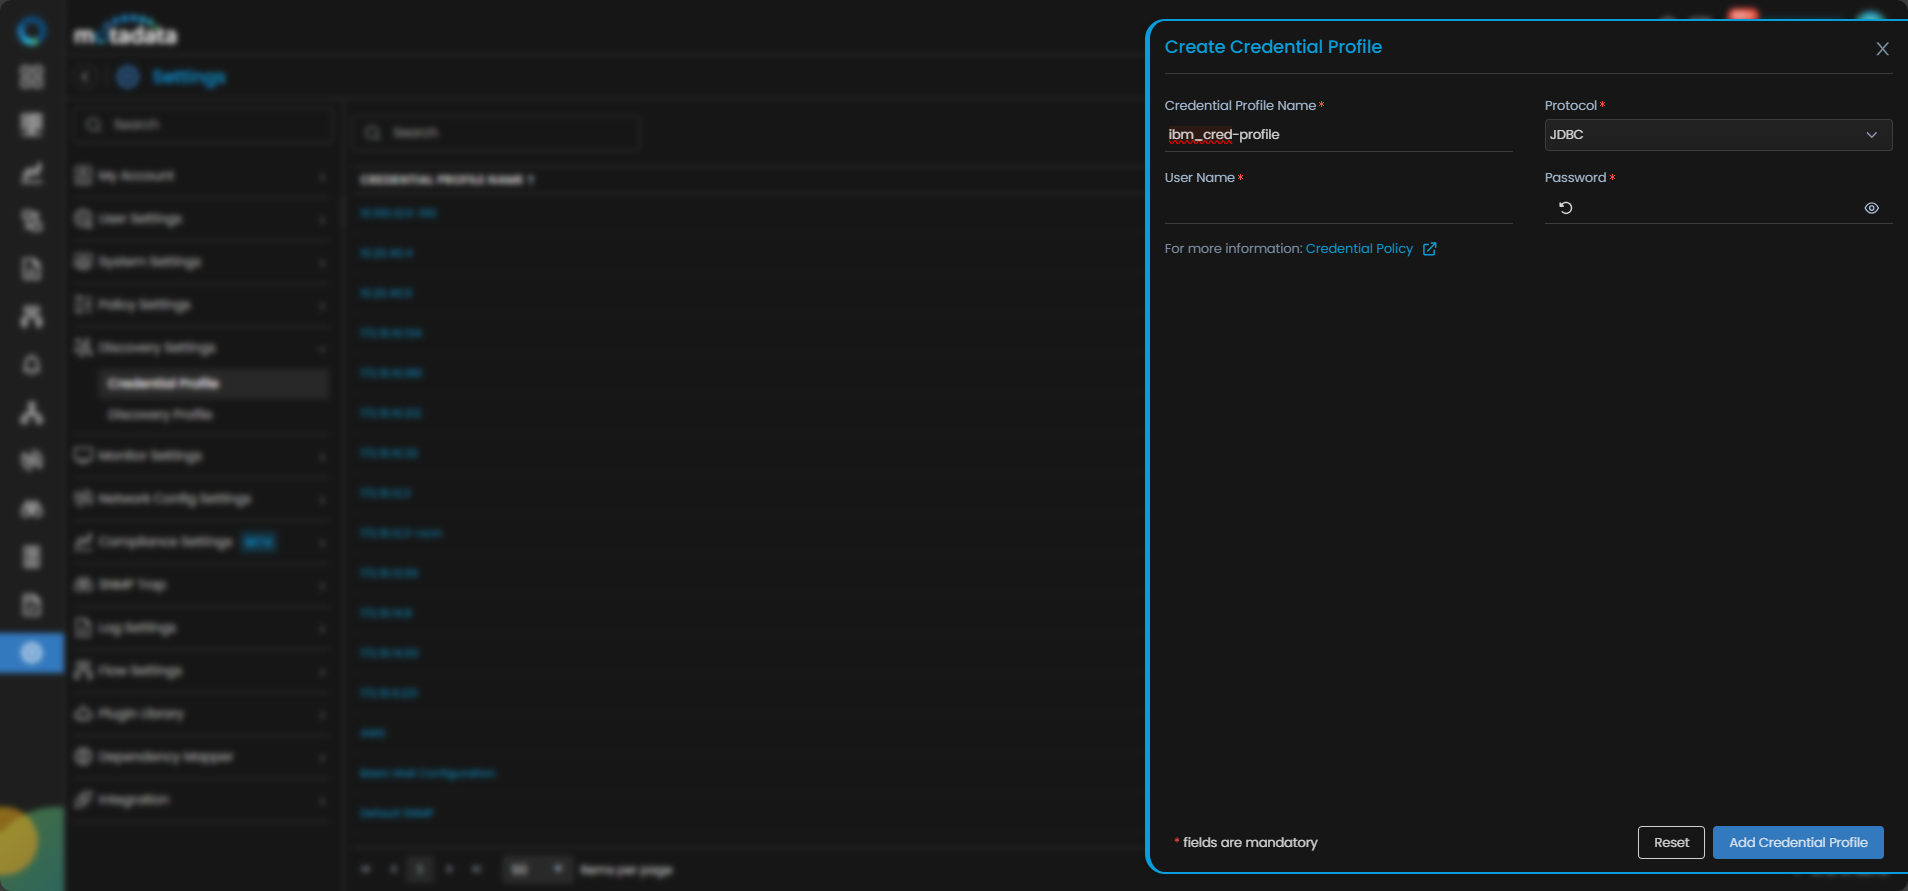
The Create Credential Profile form opens.
| Field | What to Enter |
|---|---|
| Credential Profile Name | A unique name to identify this profile |
| Protocol | Select JDBC |
| Username | The database username |
| Password | The password for that account |
Select Test to verify the credentials connect to the database. Select Reset to clear all fields. Select Add Credential Profile to save.
2. Create a Discovery Profile
Go to Menu. Select Settings . Select Discovery Settings . Select Discovery Profile. The Discovery Profile screen opens. Select Create Discovery Profile.
The Create Discovery Profile form opens. Select Database from the sidebar.
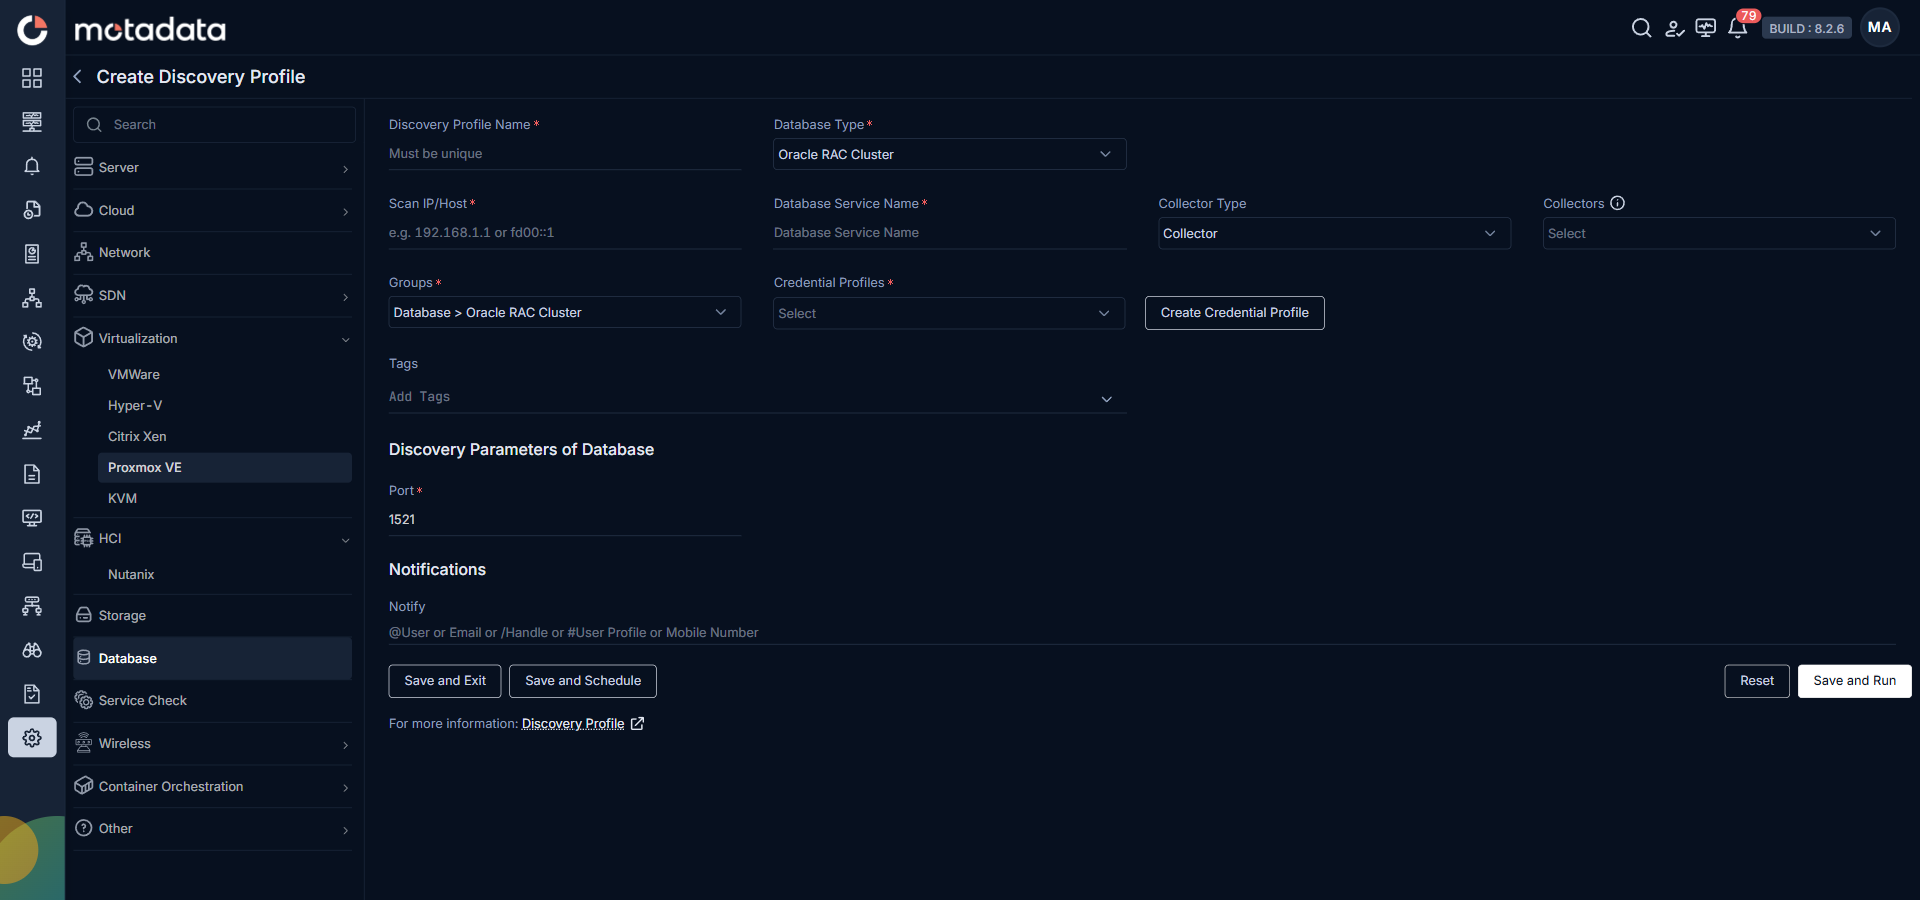
| Field | What to Enter |
|---|---|
| Discovery Profile Name | A unique name to identify this profile |
| Database Type | Select the database type from the list |
| Scan IP / Host | The IP address of the database server |
| Database Service Name | The service name associated with the database |
| Collectors | One or more Collectors for data collection. If you skip this, ObserveOps selects a Collector automatically. |
| Groups | One or more Groups to assign to provisioned monitors |
| Credential Profile | Select the database credential profile you just created |
| Tags | Tags to assign to discovered devices |
| URL Type | Select HTTP or HTTPS. Only appears for the Elasticsearch database type. |
| Port | Pre-populated. No change needed. |
| Notify Team | Email addresses, handles, or user profiles to notify when discovery completes |
Select Reset to erase all the current field values, if required.
Select Save and Exit if you have created the discovery profile but do not want to execute a discovery run.
Select Save and Schedule if you have created the discovery profile and wish to schedule its run at a specific time.
Select Save and Run if you want execute the discovery run immediately after creation.
ClickHouse uses HTTP/HTTPS (port 8123) instead of JDBC. When adding a ClickHouse database, select HTTP/HTTPS as the protocol in the Credential Profile and enter the ClickHouse username and password. In the Discovery Profile, select ClickHouse as the database type and enter port 8123. All other discovery steps remain the same.